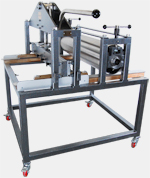
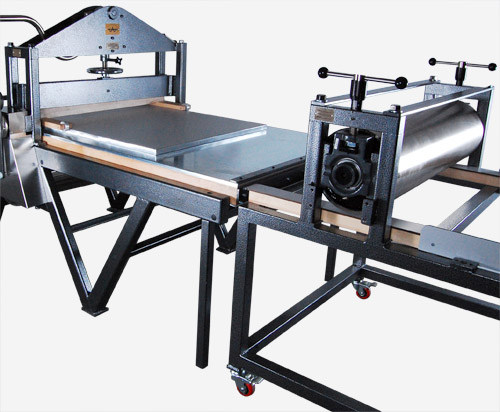
Combination Etching and Litho Printing Press
COMBINATION ETCHING & LITHO PRESS
Available in the Floor Model and the Table Top Model, hand operated combination presses eliminates the need for the private shop to purchase both lithography and etching presses. The printer may quickly attach the litho upper assembly or the etching upper assembly to the frame unit and have the versatility needed to print many types of artwork.Purchasing our combination press means you receive all of the quality features provided with each of these well engineered machines.
Converting an Existing Press
Conversions may be done to your litho or etching press, please Contact Takach Press for more information.Transfer and Storage Table
A custom built storage and transfer table is also available which will store both heads of the Combo Press, and aide in the safe and efficient switching of the pressure heads. Please see the instructional video below.Combo Capable Option
If you are considering buying a combo press in the future but are not ready to purchase both litho and etching heads now, choose the combo capable option. This feature will equip your press with the ability to bolt the second head on at a later date.Press Size and specifications
Floor Model combination presses are built on a litho press frame; please refer to the Floor Model Litho Press page for press specifications.(2) Combination Presses come with Etching and Litho Heads
 Takach Floor Model Transfer Table |
FLOOR MODEL COMBINATION PRESS STORAGE & TRANSFER TABLE
Item #1020:Floor Model Combination Press Storage & Transfer Table
This custom built table allows you to easily transfer your litho or etching head from the press to the storage table. Safely stores unused pressure head by bolting into place. Locking swivel casters included.
$1,375
Floor Model Combination Press Transfer Table Transfer Procedure
For floor model combination presses the addition of a Transfer Table makes the transition between pressure heads an efficient process.This custom built table is the safest and easiest way to switch between pressure heads.
Proper use of Takach Press Transfer Table with a Takach Combination Etching Litho Press
-
Transferring of Installed Pressure Head to the Storage Table
- The transfer table rolled on casters to the press frame .
- The transfer table is secured by locking the casters and attaching the straps to the press frame.
- "Runners" are secured with a roll pin to the press bed and transfer table creating a continuous surface for movement of the pressure heads.
- The upper and lower chain guards are removed by loosening the four phillips head bolts that hold them in place.
Note: Be sure to support the lower chain guard cover as you remove the bolts.
- To remove the gearbox, remove the lower 2 bolts completely, and loosen the two upper bolts.
Slide the gearbox down in order to remove the lower chain from the large sprocket.
Remove the previously loosened bolts to completely remove the gearbox from the pressure head. - For removal of Etching Pressure Head Lower the pressure system until the upper drum touches the runners.
For removal of Litho Pressure Head With the specialty caster unit inserted and locked into the scraper bar housing, insert and secure the specialty spacer between the scraper bar housing an yolk.
Lower the scraper bar housing and pull the specialty spacers securely into place.
Raise the scraper bar housing to lock the spacers into position. - Using a torque wrench loosen the bolts that secure the pressure head to the press frame until they move freely in the uprights.Secure the bolts in a raised position by placing the pvc spacer between the bolt head and the upright. This step ensures that the bolt clears all press parts when moving the press head.
- With the help of another person lower the pressure system so that the uprights raise above the press frame.
- Roll the head along the runners into the empty position of the transfer table.
- Raise the pressure system so that the uprights rest on the threaded boses on the transfer table.
If moving the litho head remove the specialty spacers. - In order to lower and tighten the bolts into the threaded holes in the transfer table remove the PVC spacers and set them aside.
- Tighten all bolts with a torque wrench to secure the head to the transfer table. Transferring the Desired Pressure Head To the Press
- Remove the runners, release the strap connecting the transfer table to the press frame, and unlock the casters.
- Pull the transfer table away from the press and rotate 180 degrees placing it back against the press frame with the desired pressure head towards the press.
- Lock the casters, secure the strap to connect the press frame to the transfer table, and secure the the runners.
- Loosen the bolts that secure the desired pressure head to the transfer table, insert the PVC spacers to prevent the bolt from dragging on the press of transfer table.
- With the help of another person roll the pressure head along the runners, aligning the uprights with the bosses of the press frame.
- Raise the pressure system in order to lower the pressure head onto the press frame.
- In order to lower and tighten the bolts into the threaded holes in the press frame remove the PVC spacers and set them aside.
- Using the torque wrench tighten the bolts connecting the pressure head securely to the press frame.
- If transferring the Litho Head onto the press loosen the scraper bar lock knobs. Then raise the scraper bar housing in order to remove the specialty caster unit. Roll the caster unit out from under the scraper bar housing.
- Unlock transfer table casters, release strap and pull transfer table away form the press frame. Replace the Gear Box
- Be sure to place the chain onto the sprocket as you raise the gearbox into place and reinstall the hex head bolts.
- When tightening the bolts, use a piece of wood such as a 2"x4" as a lever to raise the gearbox to tension the chain.
- Reattach the Chaingaurd covers, lower cover first, securing them in place with he four philips head bolts. Installing Bed Hardware for use with Litho Pressure Head
- The galvanized bed cover, rubber mat and bed hardware should be used with the litho head only!
- Do not use the bed hardware with the etching head! Unsafe operating conditions including damage to the upper pressure drum could occur!
- If mounting the litho pressure head to the press the galvanized bed cover and bed stop must also be mounted.
- Lay the galvanized bed cover and rubber mat onto the press with the stone stop towards the long side of the press frame making sure align the holes.
- Using an allen wrench, install the button head allen bolts to secure the galvanized bed cover, rubber matt, stone stop, and bed hardware to the press bed.


 Etching Press Blankets
 Etching Press Registration Grid
 Lubrication